



Need to log in to view the dissector?
Tap here for instructions on how to show the keyboard on the displays in the anatomy lab
- Lab outline
- Overview of the anatomy thread in the curriculum
- Anatomy lab safety, policies, and procedures
- The Willed Body Program
- Meeting your “First Patient”
- Overview of the Skeleton (Independent Study)
Anatomy Thread
Anatomy is a topic that threads throughout the pre-clerkship curriculum (years 1 and 2). There are two session types:
- Large-group sessions
- Lab sessions
Large-group sessions are generally 50 minutes. They are in-person sessions in MED 175. In FMS 501, they usually precede the lab sessions.
These sessions introduce concepts and principles and correlate gross anatomy with function and embryonic development. Although many details will be discussed, large-group sessions are not designed to cover all the material outlined under the objectives for the session, since most objectives overlap with the corresponding laboratory sessions. Large-group sessions provide a “big picture” so that details can be explored and discussed in the lab. Interactive activities to check comprehension and apply knowledge are included in most large-group sessions.
Lab sessions are in the gross anatomy labs in the Pharmaceutical and Biomedical Sciences (PBS) building. Students will be assigned to a four-person dissection team and a donor for the duration of the year.
-
- Most sessions are dissection labs where you will dissect the donor with the goal of identifying and describing anatomic structures and their relationships. Instructions and checklists of structures to be identified and discussed will be provided in the Dissector.
- A small number of the lab sessions are prosection (non-dissection) labs, in which groups of students rotate through interactive lab stations where anatomic structures will be demonstrated and discussed on prosected (previously dissected) specimens. Prosection labs include demonstrations with faculty using cadaveric specimens, draw-to-know exercises, and imaging.
- Lab exams (Pin tests)
- PALS
Throughout Year 1, there will be a number of lab exams (“pin tests”). Each exam covers material in 5 or 6 lab sessions. Consult the calendar on E.Flo MD for the dates.
PALs = Peer Anatomy Leaders! We are fortunate to have some of your second-year colleagues as instructors in lab. They are awesome resources who can not only assist you with your anatomy learning, but help you navigate through Year 1.
Lab Safety, Policies, and Procedures
The anatomy laboratories are in PBS 43, 45, 47, and 49.
Safety
Anatomy lab safety information is described here in this Lab Guide and will be covered in the Lab Orientation session.
■Know the location of the nearest fire escape, fire extinguisher, safety shower, eye wash, and first aid kit.
■There are telephones in each lab—at the north end of the labs, near the instructor’s computer. In an emergency, use them to call Campus Security or 9-1-1.
Campus security
■You have 24-7 access to the labs. For safety and security, use the “buddy system” when studying in the labs after hours = bring a classmate along. Your ID card is coded to allow you access to the PBS building, the basement corridor to the anatomy labs, and the labs themselves. If you are locked out, call Campus Security. Be aware that the door on the east end of the basement corridor is a one-way door—you can leave the basement through it, but the door locks after closing and you can’t return to the basement.
■No food or drinks are allowed in the labs.
■If you are injured in the lab, contact an instructor or the lab manager. An accident report may need to be completed.
■If the fire alarm sounds while you are working in the lab, immediately cover your donor with the blue body bag and leave the building by the fire escape route (turn left out of the lab entrance and down the hall to the fire staircase). Remain with your dissection group and assemble at the meeting site (south side of SAC building in the sidewalk area) until you have been dismissed by supervising personnel.
■The solution used to embalm the donors contains ethanol, formaldehyde, propylene glycol, and phenol. Information on hazards associated with these chemicals can be found in the Material and Safety Data Sheets kept on-line with WSU Environmental Health and Safety and with the anatomy laboratory manager.
■Formaldehyde levels in the labs are monitored by WSU Environmental Health and Safety to verify that they are below regulatory levels. Contact the Lab Manager if you have any questions.
Anatomy Lab manager
Darrel Nelson
PBS 41B
509-368-6795
Lab Policies and Procedures and Student Responsibilities
Lab Attire and PPE
■Long pants and closed-toe shoes are required in the lab. Scrubs are recommended (students supply these). Dressing rooms with lockers are across the hall from the labs.
■Gloves, safety glasses, masks, and disposable bib-style aprons are supplied. Students may wish to purchase their own eye protection to suit their style and comfort.
Lab Cleanliness
■Each dissection group is responsible for the cleanliness of their cadaver table and floor area, and the cleaning, care, and storage of instruments and tools.
■All students are responsible for the care and cleanliness of the sinks, surgical lights, computer monitors, skeletons, and models.
Make sure your area is clean before leaving each lab session!
Cadaver Tables
■Open table lids and secure them on the sides of the tables using the latches. Raise the donor from the tank using the levers at the ends of the tables.
Safety Tip
Donors are heavy—raising them up from the table is easier to do with a student on each end, pushing down on the levers simultaneously until they can be latched. Don’t release the handles until they are latched! After the donor is raised, unzip the blue body bag and fold back the white plastic and cloth sheets to expose the area you will be dissecting. Turn on the surgical lights, monitor, and computer.
Instruments and Tissue Pans
■Each group will be issued dissection tools including scalpel handles, scissors, forceps, probes, and hemostats.

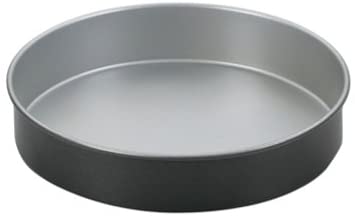
■Each group will be issued two round tissue pans. Use one of the pans for storing instruments during the lab session. This will allow you to keep track of them. Don’t place instruments loosely on the donor or in the body bags—they can be misplaced. Take an inventory of your instruments after each dissection session. Do not leave instruments in the body bags—they can corrode and become a hazard when reopening the bags. Wash and dry instruments and pans and return them to your table.
■Use the other pan for collecting tissue removed from the donor during dissection.
Tissue and Fluid Waste
■Dispose of tissue in the ORANGE pathologic waste containers located near the sinks.
Never put human tissue in regular trash bins or down the sinks.
Large skin flaps and removed organs stay in the bag with the donor.
■Put aprons, masks, gloves, and paper towels into the large WHITE or GRAY trash cans that are near the sinks.
■During each lab session, remove excess embalming fluid from the body bags via bulb syringes (“turkey basters”) and place it into the small white bucket under your table. At the end of each lab session, empty the white bucket into the plastic fluid container at your table (each table has one of these) or into the collection drum located near the sinks. If the container at your table or the collection drum are full, contact the Lab Manager. If using the collection drum, remove the drum cap, place the funnel in the drum opening, and pour the fluid into the drum. Replace the drum cap and rinse the funnel in the sink. Clean the white bucket and bulb syringe in the sink and return them to the shelf under your dissecting table.
No embalming fluids are to be poured down the sinks.
■If a small fluid spill occurs on the floor, immediately clean it up with paper towels and the cleaning solutions available on the front counters and place the paper towels in the orange tissue barrel. If a large spill occurs, notify your lab instructor or the Lab Manager.
■Keep donors covered with the cloth sheets, white plastic, and blue body bag when not in use.
■To prevent desiccation, moisten student dissections and prosections as needed with the 2% Phenoxyethanol solution in the squeeze bottles and mist bottles located on the counters in the front of the labs.
■Gloves should be worn to decrease skin contact with chemicals.
To load a scalpel blade
Peel back the plastic covering over the scalpel blade about halfway. With a forceps or hemostat, slide (do not force!) the slotted portion over the raised rib of the scalpel handle until it clicks, and you feel it lock into place. See Figure 1.3. Keep your fingers away from the blade.
To remove a scalpel blade
Remove scalpel blades by using the yellow or red blade remover boxes mounted on the walls in the labs OR remove the scalpel blades the old-fashioned way by using forceps or needle holders as shown in Figure 1.4—place the removed blades in the sharps container box on the front counters in the labs.


Do not put scalpel blades or other sharp items in the garbage cans or the Biohazard bins!
When to use a scalpel
Use scalpels sparingly for cutting skin, fascia, and muscles or transecting organs. They often do more harm than good. Most dissection tasks can be accomplished with scissors and forceps. Blunt dissection for gross separation can be done with your gloved hands.
The Willed Body Program
Donated bodies used for training our medical students are obtained via the WSU Willed Body Program. Body donors and their families are thoughtful individuals who wanted their remains to be used for education and research.
As a medical student, having the opportunity to learn from these unique gifts is a privilege.
The rules and regulations pertaining to our anatomy lab are based upon the premise that dignity and respect for anatomical donors must always be observed. Inappropriate behavior directed toward a donated body is a breach of professionalism and trust established with the donor.
Important Policies: Dignity and Respect for Body Donors
■Cameras (phone or iPad) can be used in lab ONLY for photographing drawings on the whiteboards. Otherwise, NO photography or videography is allowed in the labs without special permission of instructors.
■What happens in the lab stays in the lab. Be careful about posts on social media.
■Visitors are NOT permitted in the lab at any time except with the special permission of the teaching staff.
■Skeletons, skulls, and bones are to be given the same respect as the donors.
■Human specimens may NOT be removed from the anatomy laboratories.
■Do not remove the metal identification tags from donors.
■Use a probe or pipe cleaner when studying donors, isolated organs, bones, skulls, or models. Never use pencils or pens!
Protocols are in place to screen donations prior to acceptance to make sure they are suitable for our program. Bodies remain in our program for up to four years. After this time the body is cremated, and the remains returned to families or interred in our Program’s cemetery plot.
We are fortunate to have this resource. The hands-on learning so vital to the study of anatomy would not be possible without these gifts!
Meeting Your “First Patient”
Assemble your dissection team and find your table. A placard at the end of the table will list the donor’s WSU identification number.
Open the table, raise the donor, and open the body bag, plastic shroud, and sheet. Keep the face and hands covered. As a group, examine the body and practice using anatomic terminology.
■What are the named regions of the body?
■What do terms like superior/inferior, medial/lateral, anterior/posterior, and medial/lateral mean? Practice!
■What do you see? Look for skin lesions, scars, and medical devices (pacemakers, ports).
■The physical build of a body is called the “habitus”. How would you describe your donor’s habitus? Examine symmetry and muscle mass. Atrophy in the lower limbs could mean your donor was bed-ridden or non-ambulatory.
■Examine your donor for about 10 minutes. Afterwards, each group will be asked to give a short verbal presentation about their donor to the rest of the lab. Use your presentation skills and dazzle the class by using anatomic terms!
Example
“Our donor is a 75-year-old female with a thin habitus and scaphoid (sunken) abdomen . . . we discovered a scar with wires in the midline of the sternum, suggesting a sternotomy and possible heart disease . . . there is a tattoo on the distal arm . . . scars over the proximal tibia near the knee joint may indicate joint replacement surgery.”
■Starting today, keep notes on your donor. The clues you obtain from week-to-week will help you paint a picture of your donor and provide a window into their life and infirmities. The amount of health history obtained by the Willed Body Program varies from donor to donor. It will not be divulged until the end of the year, so that students can hypothesize and learn through their studies how aging and disease has affected their donor.
The first encounter with a deceased human may very well have an emotional impact and produce some stress as you adjust.
This is natural and understandable.
Remember that the donors want you to learn from them—they are silent but amazing teachers. If you have problems, you are encouraged to seek out advice from your instructors, your PALs, or members of the college counseling staff. All have been through similar experiences.
Lab Disclosure Form
Students will be asked to sign this during the Lab Orientation. The form documents agreed upon responsibilities regarding ethics and professionalism in the gross anatomy lab. It is published here for your reference.
Disclosure form: Human Anatomy Laboratory
Elson S. Floyd College of Medicine at Washington State University
The donation of one’s body after death for the purpose of medical education is an extraordinary gift provided by selfless individuals to help educate the hearts and minds of future physicians. The opportunity to examine and dissect the human body is a privilege for students that carries with it an important responsibility for treating the donor with the respect and dignity they deserve. It is important that students appreciate the opportunities afforded and observe the policies outlined below. These policies have been set up to promote respect for the donor and success for you in the laboratory.
Human Anatomy Laboratory Policies and Regulations
- Students are required to attend the Anatomy Laboratory orientation during the first week of classes.
- Photographing or video recording human anatomical material is strictly prohibited without special permission granted by Anatomy faculty, including any images intended for publication. Distribution of such images by medical students, regardless of their source, is also prohibited.
- So that donated anatomical material can be tracked, the donor’s identification tags must be kept with the body. If the tags become disassociated from the donor, the Course Director or Laboratory Manager should be contacted. All tissue removed from the donor during dissection must be disposed of properly as described in the lab orientation.
- Anatomical material may not be removed from the laboratory.
- Unauthorized access to the lab is not permitted. Individuals not enrolled in the course are not permitted in the lab at any time without permission of the Faculty or Lab Manager.
- Disrespectful language, improper handling, or any other behavior deemed inappropriate toward the donor or dissection process will not be tolerated. Both conversational and written language relating to the donor and donor dissection by medical students must be respectful and discrete. Any personal information about the donor is confidential and students are not allowed to disclose this information.
- The use of the Internet and social media by students as a venue for discussing the donor or donor dissection is prohibited.
- Proper attire should be worn for anatomical study. Acceptable items include scrubs, lab jacket, long pants or long skirt, and closed-toed shoes.
- Gloves and eye protection should be worn during anatomical study.
- The laboratory must remain clean. Laboratory tables, surgical lights, and computer monitors should be wiped down after each lab, and the floors should be kept free of spills and wastes. Keeping the lab clean demonstrates professionalism and respect for donors and colleagues.
Please read the following statements and place a check mark in the respective boxes to signify your comprehension of the rules and agreement to comply.
- I verify that I have attended the Anatomy Laboratory Orientation session.
- I understand that my access to anatomical materials is a privilege, and anatomical donations have been made by consenting individuals and/or families to enhance anatomy education and research.
- I understand that it is my responsibility to adhere to the policies of the Anatomy Program discussed in the Laboratory Orientation and outlined in the Human Anatomy Laboratory Policies and Regulations printed on this disclosure form.
- I understand that failure to comply with the rules and policies pertaining to the Elson S. Floyd College of Medicine Anatomy Program are considered a violation of professionalism and honor code and will be handled in accordance with policies set forth by the College of Medicine Office of Student Affairs, which could include removal from the anatomy course, conduct review by the Student Evaluation, Promotion, and Awards Committee (SEPAC), and/or criminal charges if warranted.
- I verify that to the best of my knowledge I do not know any Washington State University Willed Body Program donors who have died within the last four years.
If a donor is known, please leave this box unchecked, and fill in the donor’s name below:
_____________________________________________
- I have read and understand the Human Anatomy Laboratory Policies and Regulations on the reverse side of this page and that compliance with all policies and regulations is mandatory.
Independent Study: Overview of the Skeleton
This is an independent study topic. Work with your dissection team and a skeleton to hammer this out.
- Access Complete Anatomy screens
To access the Complete Anatomy screens that have been created for you:
-
- Open the Complete Anatomy app on your iPad and log in.
- Go to the Notifications icon in the upper right-hand corner and accept the invitation.
Problems or questions? Get in touch with MedTech, and they will have you up and running in no time.
Skeleton screen
Bones of the Axial Skeleton
■Skull
■Hyoid bone
■Vertebral Column
■Cervical vertebrae (7)
■Thoracic vertebrae (12)
■Lumbar vertebrae (5)
■Sacrum (5 fused vertebrae)
■Coccyx (3–5 vertebrae fused into 2–3 pieces)
■Thoracic Skeleton (Bony Thorax)
■Sternum
■Ribs (12) with costal cartilages
■Thoracic vertebrae (12)
Bones of the Appendicular Skeleton
■Pectoral Girdle
■Clavicle
■Scapula
■Free Upper Limb
■Humerus
■Radius
■Ulna
■Carpal bones (8)
■Metacarpals (5)
■Phalanges
■Pelvic Girdle
■Hip (Coxal) Bone (2)
■Ilium
■Ischium
■Pubis
■Free Lower Limb
■Femur
■Patella
■Tibia
■Fibula
■Tarsal bones (7)
■Metatarsals (5)
■Phalanges